Hallo,

ich habe noch eine stattliche Anzahl von selbstegbrannten CDs und DVDs
die teils schon weit über 20 Jahre alt sind. Neulich hatte ich auf einer
der alten Scheiben etwas gesucht und musste feststellen, dass viele
davon schon Probleme machen beim lesen. Auch Versuche mit verschiedenen
Laufwerken deuten darauf hin, dass die CDs gealtert sind. Nun möchte ich
gerne alles auf HDD archivieren, vorzugsweise als Images, die ich dann
bei Bedarf mounten bzw. Dateien darauf extrahieren kann. Gibt es eine
Softwarelösung die diesen Prozess des Einlesens weitestgehend
automatisiert und auch mit Lesefehlern klarkommt ohne mit
Fehlermeldungen abzubrechen? Ich nutze Windows als auch Linux (UBuntu)
und bin für eure Vorschläge offen.
Ich benutze seit droellfzig Jahren "Blindwrite"
von VSO Software SARL. Das hat fuer alle solche
Lebenslagen vorgefertigte (Lese und Schreib-)Profile:
- Automatic
- Audio-CD
- Audio-CD+G
- Bad Sectors
- ISO-Image
- NoSplit
- Normal
- Nibble

Die Linuxer werden ja wieder mit ihrem ddrescue kommen,
das kennt aber die Spezifika eines optischen Mediums
nicht.
P.S.: Huelfreich kann es sein, sich ein Laufwerk mit
besonders guten Leseeigenschaften auszusuchen und die
Lesegeschwindigkeit per Software u.U. auf 2-fach zu
begrenzen.
bash ist dein Freund und Scriptneger für alle Lebenslagen! <:)

Seit WSL auch auf Windows, wer es so mag...

Ganz hilfreich sind natürlich JukeBox-CD-Laufwerke z.B. von Nakamichi
worin man gleich mehrere Silberscheiben schieben kann (hoffentlich
einzeln, nicht nur alle gleichzeitig weil so doofe Mehrfachcaddies...)
Die c't hatte da mal einen Artikel und super tool, kannst mit mehreren
Laufwerken die verschiedenen Teile der Silberscheibe versuchen
einzulesen ...
https://www.heise.de/ct/artikel/Silberpuzzle-290022.html
https://www.heise.de/download/product/h2cdimage-39056
Viel Erfolg.
So schlimm wird es schon nicht sein.
Ich schätze max. 1 von 100.
Und dann unterscheiden ob Daten, Video oder Audio.

Gut ist es, wenn man alte Laufwerke aufgehoben hat.
Bei Audio können Fehler übersprungen werden.

Solche Parameter können aber in einem ordentlichen Programm wie NERO
eingestellt werden.

Und oft sind alte Scheiben unwichtig oder können leicht ersetzt werden.
Wichtige Daten hat man auch in der Vergangenheit mehrfach gesichert.
ich nutze dafür schon lange CloneCD. Die Images können auch in
virtuellen Maschinen (MS VirtualPC und ich glaube (!) auch in
VirtualBox).
Glaube, sogar 7zip kann daraus Dateien extrahieren.
Ansonsten in das virtuelle CD-Laufwerk von CloneCD einlegen und nutzen,
als sei sie physisch vorhanden.
ImgBurn, geht gut via cmd
damit habe ich noch JEDE scheibe retten können
schau dir nur die funktionen an, da brauchts keine weitere erklärung
mehr ...


|==================================|
| Program Name: | ImgBurn          |
|==================================|
| Author:       | LIGHTNING UK!    |
|==================================|

Supported Command Line Switches:

(You can get a basic version of this list via 'ImgBurn.exe /?')

/MODE <PICKER | READ | BUILD | WRITE | VERIFY | DISCOVERY>
  Used to tell the program which 'Mode' to open up in.

/BUILDINPUTMODE <STANDARD | ADVANCED>
  Used to tell the program which 'Build Input Mode' to open up in.
  Only applies to BUILD mode.

/BUILDOUTPUTMODE <DEVICE | IMAGEFILE>
  Used to tell the program which 'Build Output Mode' to open up in.
  Only applies to BUILD mode.

/SRC <Drive Letter | SCSI Address> | "<Folder Name>\" | "<File Name>" |
ALLSECTORS | <Custom Number Of Sectors>
  Used to select the source drive or filename.
  Drive Letter or SCSI Address applies to READ and VERIFY modes.
  Folder Name applies to BUILD mode.
        File Name applies to BUILD and WRITE modes.
  ALLSECTORS applies to DISCOVERY mode.
  Custom Number Of Sectors applies to DISCOVERY mode.
  Examples: /SRC J:
      /SRC 1:0:0
      /SRC "C:\DVD_FILES\VIDEO_TS\"
      /SRC "C:\DVDIMAGE.ISO"
      /SRC "C:\BackupProject.IBB"
      /SRC ALLSECTORS
      /SRC 2295000

  In BUILD mode, you can specify an '.IBB' file as the source.
  This is an 'ImgBurn Backup Project' file and is a simple text file
containing the names of folders / files to add to the image, along with
the various configuration options.
  The simplest way to find the correct syntax for an '.IBB' file is to
have ImgBurn create one via the 'Save Project...' option in the 'File'
menu, and then look at it in notepad.

  In BUILD mode, you can specify multiple folders / files directly if
you put a pipe character ('|') between them.
  Example: /SRC
"C:\Folder1\|C:\Folder2\|C:\Document1.txt|C:\Document2.txt"

/SRCLIST "<File Name>"
  Used to specify a text file that represents a basic list of folders /
files to be added to the 'Source' box.
  Only applies to BUILD mode.
  Example: /SRCLIST "C:\BackupList.txt"

/DEST <Drive Letter | SCSI Address> | "<File Name>"
  Used to select the filename or drive.
  Drive Letter or SCSI Address applies to BUILD, WRITE and DISCOVERY
modes.
  File Name applies to READ, BUILD and VERIFY modes ('DEST' actually
means 'Compare' here for VERIFY mode).
  Examples: /DEST J:
      /DEST 1:0:0
      /DEST "C:\DVDIMAGE.ISO"

  When in READ mode, you can use '[DISC_LABEL]' | '[DATETIME]' |
'[DATE]' | '[TIME]' (without quotes) anywhere in the file name specified
with this switch, and the program will replace it with the appropriate
value.
  When in BUILD mode, you can use '[DATETIME]' | '[DATE]' | '[TIME]'
(without quotes) anywhere in the file name specified with this switch,
and the program will replace it with the appropriate value.
  Examples: /DEST "C:\DVDIMAGES\[DISC_LABEL].ISO"
            /DEST "C:\DVDIMAGES\DailyBackup_[DATETIME].ISO"

/FILESYSTEM "<File System>"
  Used to change the value of the 'File System' drop down list.
  Only applies to BUILD mode.
  The parameter must match the value within the drop down list exactly.
  Examples: /FILESYSTEM "ISO9660"
      /FILESYSTEM "ISO9660 + Joliet"
      /FILESYSTEM "ISO9660 + UDF"

/UDFREVISION "<UDF Revision>"
  Used to change the value of the 'UDF Revision' drop down list.
  Only applies to BUILD mode.
  The parameter must match the value within the drop down list exactly.
  Examples: /UDFREVISION "1.02"
      /UDFREVISION "2.50"

/VOLUMELABEL "<Volume Label>"
  Used to set the value of the volume label fields.
  Only applies to BUILD mode.
  Length limits are automatically applied. i.e. 32 chars for ISO9660, 16
for Joliet, 126 for UDF.

  To specify different volume labels for each file system, the following
switches are also available:

  /VOLUMELABEL_ISO9660 "<Volume Label>"
  /VOLUMELABEL_JOLIET "<Volume Label>"
  /VOLUMELABEL_UDF "<Volume Label>"

  These will override what's been set (if anything) by the
'/VOLUMELABEL' switch.

/SPEED <Write Speed>
  Used to change the value of the 'Write Speed' drop down list.
  The parameter must match the value within the drop down list exactly.
  Examples: /SPEED MAX
      /SPEED 1x
      /SPEED 2.4x (or 2,4x depending on regional settings)

/COPIES <Number Of Copies>
  Used to change the value of the 'Copies' drop down list.
  The parameter must match the value within the drop down list exactly.
  Only applies to WRITE mode.
  Example: /COPIES 2

/LAYERBREAK <LBA>
  Used to tell the program where to put the layerbreak.
  Only applies to WRITE and DISCOVERY modes and only when burning DVD+R
DL discs.
        Example: /LAYERBREAK 2000000

/ERASE
  Used to automatically erase  format  overwrite media.

/OVERWRITE <YES | NO>
  Used to force the program to either overwrite all existing files, or
never overwrite them.

/TESTMODE <YES | NO>
  Used to make the program simulate the burn - whereby no data is
actually written to the disc.
  Basically, it just checks (or unchecks!) the 'Test Mode' box for you!

/VERIFY <YES | NO>
  Used to make the program verify a disc is readable after it has been
burnt.
  Basically, it just checks (or unchecks!) the 'Verify after write' box
for you!

/DELETEIMAGE <YES | NO>
  Used to make the program delete the image after it has been burnt.
  Basically, it just checks (or unchecks!) the 'Delete Image When Done'
box for you!

/DELETESOURCE <YES | NO>
  Used to make the program delete the source files after they've been
burnt.
  Only applies to BUILD mode. *** USE WITH CAUTION ***

/EJECT <YES | NO>
  Used to make the program eject the disc after it has been burnt.
  Basically, it just checks (or unchecks!) the 'Eject Tray When Done'
box for you!

/START
  Used to start the burn process automatically when the program has
finished initialising.
  Basically, it just presses the 'Build' / 'Read' / 'Verify' / 'Write'
button for you!

/CLOSE
  Used to close the program when the burn process has finished.
  Basically, it just presses the 'Close' button for you!

/CLOSEINFO
  Used to close the program when the text file specified by '/INFO' has
been created.
  Basically, it just presses the 'Close' button for you!

/CLOSESUCCESS
  Used to close the program when the burn process has finished AND was
successful.
  Basically, it just presses the 'Close' button for you!

/SHUTDOWN
  Used to shutdown the computer when the program has finished burning.
  Basically, it just checks the 'Shutdown computer when done' box for
you!

/WAITFORMEDIA
  Used in combination with /START and /CLOSE to wait until the program
is 'Ready' to burn before trying to start.
  Normally, if the program isn't 'Ready', the /CLOSE switch causes the
program to close without having done anything.

/IGNORELOCKVOLUME
  Used to make the program ignore any 'Access is denied' errors it might
run into when it tries to lock the drive for exclusive access, meaning
the burn can continue without user intervention.
  This is mainly for 3rd party applications that are unable to release
any 'handles' that they might have open to the drive - thus preventing
ImgBurn from obtaining the lock.

/NOIMAGEDETAILS
  Used to stop the program from displaying details about the image.
  Only applies to BUILD mode.

/ROOTFOLDER <YES | NO>
  Used to automate the 'Root Folder' prompt you get when only adding a
single folder to the source list.
  Only applies to STANDARD input mode within BUILD mode.

/BDMVFOLDERS <YES | NO>
  Used to override the 'Create BDMV Folders' option in the settings.
  Only applies to BUILD mode.

/CERTIFICATEFOLDER <YES | NO>
  Used to automate the 'Certificate Folder' prompt you get when a
'CERTIFICATE' folder is present at the same directory level as the
BDAV/BDMV folder but hasn't been included.
  It will also override the 'Create CERTIFICATE Folder' option in the
settings.
  Only applies to BUILD mode.

/PRESERVEFULLPATHNAMES <YES | NO>
  Basically, it just checks (or unchecks!) the 'Preserve Full Pathnames'
box for you!
  Only applies to BUILD mode.

/RECURSESUBDIRECTORIES <YES | NO>
  Basically, it just checks (or unchecks!) the 'Recurse Subdirectories'
box for you!
  Only applies to BUILD mode.

/INCLUDEHIDDENFILES <YES | NO>
  Basically, it just checks (or unchecks!) the 'Include Hidden Files'
box for you!
  Only applies to BUILD mode.

/INCLUDESYSTEMFILES <YES | NO>
  Basically, it just checks (or unchecks!) the 'Include System Files'
box for you!
  Only applies to BUILD mode.

/INCLUDEARCHIVEFILESONLY <YES | NO>
  Basically, it just checks (or unchecks!) the 'Include Archive Files
Only' box for you!
  Only applies to BUILD mode.

/CLEARARCHIVEATTRIBUTE <YES | NO>
  Basically, it just checks (or unchecks!) the 'Clear Archive Attribute'
box for you!
  Only applies to BUILD mode.

/FILESYSTEMONLY
  Used to make the program create an image with nothing but the file
system in it - i.e. no actual file data (or anything that would normally
come after the file data).
  The image will be useless for anything except looking at the file
system layout, you have been warned!
  Only applies to BUILD mode. *** USE WITH CAUTION ***

/OPTIMISEDUPLICATEFILES
  Used to make the program detect duplicate files within your
compilation and only store the data for those files once - thus saving
disc space.
  Only applies to BUILD mode.

/BOOTEMUTYPE <0 | 1 | 2 | 3 | 4>
  Basically, it just modifies the 'Emulation Type' field on the
'Advanced' -> 'Bootable Disc' tab for you!
  Only applies to BUILD mode.
        0 = None (Custom)
  1 = Floppy Disk (1.20 MB)
  2 = Floppy Disk (1.44 MB)
  3 = Floppy Disk (2.88 MB)
  4 = Hard Disk
  Example: /BOOTEMUTYPE 0

/BOOTIMAGE "<File Name>"
  Basically, it just modifies the 'Boot Image' field on the 'Advanced'
-> 'Bootable Disc' tab for you!
  Only applies when the '/BOOTEMUTYPE' switch is also specified.
  Only applies to BUILD mode.
  Example: /BOOTIMAGE "C:\BootImage.ima"

/BOOTDEVELOPERID "<Developer ID>"
  Basically, it just modifies the 'Developer ID' field on the 'Advanced'
-> 'Bootable Disc' tab for you!
  Only applies when the '/BOOTEMUTYPE' switch is also specified.
  Only applies to BUILD mode.
  Example: /BOOTDEVELOPERID "LIGHTNING UK!"

/BOOTLOADSEGMENT <Load Segment>
  Basically, it just modifies the 'Load Segment' field on the 'Advanced'
-> 'Bootable Disc' tab for you!
  Only applies when the '/BOOTEMUTYPE' switch is also specified.
  Only applies to BUILD mode.
  "Load Segment" should be specified as 4 digit/character hexadecimal
value.
  Example: /BOOTLOADSEGMENT 07C0

/BOOTSECTORSTOLOAD <Sectors To Load>
  Basically, it just modifies the 'Sectors To Load' field on the
'Advanced' -> 'Bootable Disc' tab for you!
  Only applies when the '/BOOTEMUTYPE' switch is also specified.
  Only applies to BUILD mode.
  Example: /BOOTSECTORSTOLOAD 4

/BOOTPATCHBOOTINFOTABLE
  Basically, it just checks the 'Patch Boot Information Table' box on
the 'Advanced' -> 'Bootable Disc' tab for you!
  Only applies when the '/BOOTEMUTYPE' switch is also specified.
  Only applies to BUILD mode.

/IBG "<File Name>"
  Used to make the program write the graph data to a file of the
specified name after burning (or verifying if it's enabled).

/LOG "<File Name>"
  Used to make the program write the log to a file of the specified name
when closing down.
  You can use '[DATETIME]' | '[DATE]' | '[TIME]' (without quotes)
anywhere in the file name specified with this switch, and the program
will replace it with the appropriate value.
  Example: /LOG "C:\ImgBurn Logs\DailyBackup_[DATETIME].log"

/LOGAPPEND
  When used in combination with '/LOG "<File Name>"', it will make the
program try and append to the file rather than overwrite it.

/LOGHEADER
  When used in combination with '/LOG "<File Name>"', it will make the
program add a header to the log showing the program version, date and
time.
  It is recommended that this switch be used when creating a new log
file that you will later append to via use of the '/LOGAPPEND' switch.
        The same header is automatically added when using the
'/LOGAPPEND' switch so this switch need not be specified.

/NOSAVELOG
  Used to tell the program not to save the log when it's closed.

/INFO "<File Name>"
  Used to make the program write the contents of the drive/media
information window (on the right side of the main window) to a file of
the specified name after full initialising the media.

/PORTABLE
  Used to make the program skip the sections where it would normally
write file association  autoplay  shell extension data to the
registry.
  When used in combination with '/SETTINGS "<File Name>"', you can make
it so ImgBurn doesn't make any changes to the PC it's being run on. This
is useful if you're running it from a USB pen etc.

/LANGID <Language Identifier>
  Used to tell the program which language to start up in. Values can be
in decimal or hexadecimal formats. The appropriate '*.lng' file must
exist in the 'Languages' folder.
  Example: /LANGID 0x0809
     /LANGID 2057
     Both of the above will cause the program to start with the GUI
interface in the 'English (United Kingdom)' language.

/SETTINGS "<File Name>"
  Used to override loading the settings from the registry, and instead
load from / save to the specified file.
  If the file does not exist, default settings will be used and the
program will attempt to save to the specified file when it's closed.

  Even if this switch is not specified, the program will attempt to load
from 'ImgBurn.ini' in the application exe's directory BEFORE it loads
from the registry.

/NOSAVESETTINGS
  Used to tell the program not to save ANY settings when it's closed.


========================================================================
=======


ErrorLevel  Exit  Return values:

0 = No error detected.
1 = Read/Write/Build/Verify/Discovery couldn't start - drive not ready
etc.
2 = Read/Write/Build/Discovery failed.
3 = Verify failed.
4 = Read/Write/Build/Discovery aborted.
5 = Verify aborted.


========================================================================
=======

THE END
Längeren Sourcecode nicht im Text einfügen, sondern als Dateianhang
Kommandozeile vor dem Frühstück für Alle! schrieb:
> bash ist dein Freund und Scriptneger für alle Lebenslagen! <:)

Ich wittere Rassismus!
> schau dir nur die funktionen an, da brauchts keine weitere erklärung mehr

Wie es scheint, kann diese Software nicht mal die Subchannel eines
optischen Datentraegers lesen.

Damit halte ich:
> habe ich noch JEDE scheibe retten können
fuer ein Geruecht. Allenfalls "JEDE" die dir bis jetzt untergekommen
ist.

Auch bei CD/DVD gilt: Mann muss wissen was man tut.
auweia schrieb:

> Damit halte ich:
>> habe ich noch JEDE scheibe retten können
> fuer ein Geruecht. Allenfalls "JEDE" die dir bis jetzt untergekommen
> ist.
>
> Auch bei CD/DVD gilt: Mann muss wissen was man tut.

Sehr schlau, MinusBrain. Habe keine Scheibe retten können die ich nicht
habe!?!? Was für Idioten hier ...
Bis jetzt habe ich jede CD mit
https://www.heise.de/download/product/h2cdimage-39056 extrahieren
können, wenn auch auf verschiedenen Laufwerken.
Äh, nee so böse verschlissen waren meine Rohlinge nicht.
Aber ich hatte z.b. einige gepresste Treiber-CDs die reglär nicht mehr
lesbar waren.
Ich habe immer mit Nero und CloneCD/DVD gute Erfahrungen gemacht.
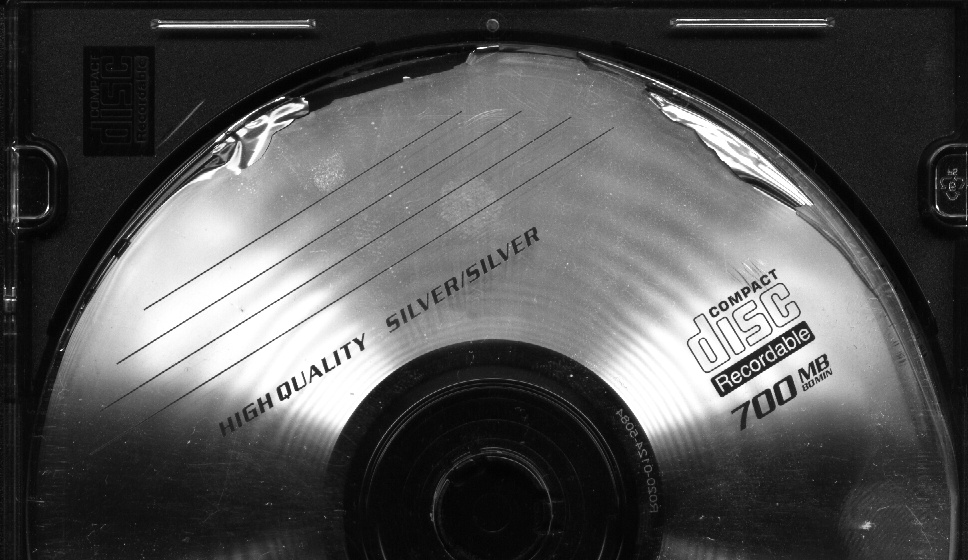
michael_ schrieb:
> So eine auch?

Theoretisch sollte das schon möglich sein, praktisch ist das wohl eine
Frage des Aufwandes. Was sich da hochkringelt ist (mit etwas Glück) nur
die Reflexschicht, nicht die Datenschicht mit den durch den Schreiblaser
gemachten klaren/trüben Pits.

Strategie: Reflexschicht vorsichtig entfernen und neu aufbringen
(Silbernitrat?). Nur so ... theoretisch ...
Frank E. schrieb:

> Strategie: Reflexschicht vorsichtig entfernen und neu aufbringen
> (Silbernitrat?). Nur so ... theoretisch ...

Funktioniert, ist aber unwirtschaftlich. Gepresste CDs werden
üblicherweise in größeren Auflagen hergestellt, und da kann man sich
auch ein anderes Exemplar besorgen.

Anders sieht es aus bei "gebrannten" CD-R oder CD-RW. Da steckt die
Information in einer grünen oder blauen Farbe, die an den gewünschten
Stellen mit einem Laser weggeschmurgelt (bzw bei Phase Change
umgeschmolzen) wird. Wenn da der Lack ab ist sind die Bits weg. Und
gebrannte CDs sind meist Unikate :-(
michael_ schrieb:
> So eine auch?

Da eine CD ja von innen in einer Spirale nach aussen beschrieben wird
kann es schon sein, dass sich der Großteil rekonstruieren lässt.
Ein Vorteil mit ddrescue wäre, dass man mit mehreren Laufwerken das
selbe Image weiter vervollständigen könnte. Wenn also ein teil nur ein
Laufwerk lesen kann, und ein anderes einen anderen, kann man da mehr
raus holen. Von dingen, wie z.B. den korrektur bits auf CDs, sehen die
Programme ja sowieso nichts, die interpretiert doch bereits das
Laufwerk. Und falls da dinge im ISO/UDF/etc. format sind, kann man da
auch nachher noch Programme drauf los lassen.
Soul E. schrieb:
> Frank E. schrieb:
>
>> Strategie: Reflexschicht vorsichtig entfernen und neu aufbringen
>> (Silbernitrat?). Nur so ... theoretisch ...
>
> Funktioniert, ist aber unwirtschaftlich. Gepresste CDs werden
> üblicherweise in größeren Auflagen hergestellt, und da kann man sich
> auch ein anderes Exemplar besorgen.

Ja klar, ich meine das auch nur für selbstgebrannte einzelne CDs mit
besonders wichtigem Inhalt.
Frank E. schrieb:

> Ja klar, ich meine das auch nur für selbstgebrannte einzelne CDs mit
> besonders wichtigem Inhalt.

Gerade da funktioniert es aber nicht, denn beschreibbare CDs werden
gebrannt und nicht gepresst. Da steckt die Info in dem Lack, nicht in
der Plastikscheibe.
Soul E. schrieb:
> Frank E. schrieb:
>
>> Ja klar, ich meine das auch nur für selbstgebrannte einzelne CDs mit
>> besonders wichtigem Inhalt.
>
> Gerade da funktioniert es aber nicht, denn beschreibbare CDs werden
> gebrannt und nicht gepresst. Da steckt die Info in dem Lack, nicht in
> der Plastikscheibe.

Nein - das habe ich auch nie behauptet. Die Information einer
"gebrannten" CD steckt in einer speziellen Farbsoff-Schicht ("Dye"), die
vom Schreiblaser (durch das Polycarbonat hindurch) "getrübt" wird, vor
bzw. unter der Reflexschicht. Es besteht also durchaus die Möglichkeit,
dass sich nur die Reflexschicht löst, das Dye aber nicht.

Die Diskussion ist alerdings müßig, so lange wir den Zustand der
beschädigten CD nicht wirklich kennen ...
Bitte melde dich an um einen Beitrag zu schreiben. Anmeldung ist kostenlos und dauert nur eine Minute.
Bestehender Account
Schon ein Account bei Google/GoogleMail? Keine Anmeldung erforderlich!
Mit Google-Account einloggen
Mit Google-Account einloggen
Noch kein Account? Hier anmelden.